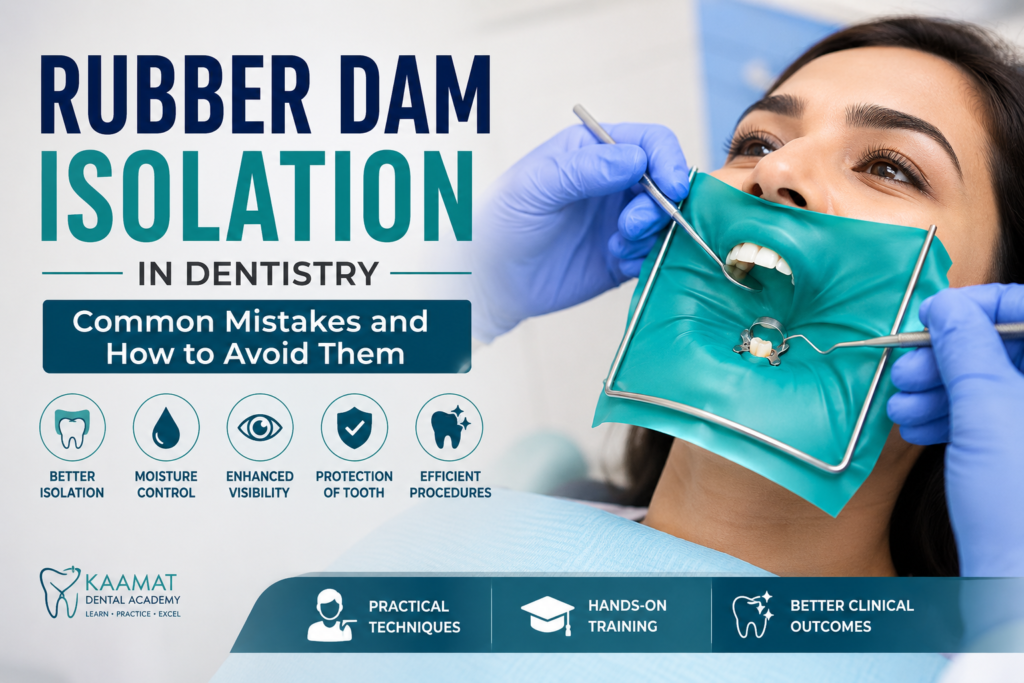
Rubber dam isolation is an important clinical technique used to separate the treatment area from the rest of the oral cavity. By creating a more controlled working field, it can help dentists manage moisture, improve visibility, and work more consistently during procedures where isolation is important.
For dentists, however, placing a rubber dam is not simply a matter of putting a sheet and clamp around a tooth. Clamp selection, positioning, tissue management, sealing, patient comfort, and procedural planning can all influence the quality of isolation.
Small technical problems can make the dam unstable, allow leakage, or make access to the treatment area more difficult.
For dentists developing their clinical skills, understanding these practical details is important before incorporating rubber dam isolation into routine procedures.
What Makes Rubber Dam Isolation Effective?
Effective isolation depends on more than achieving a visible seal around the tooth.
A well-planned setup should provide:
- Adequate separation of the treatment field
- Stable positioning of the rubber dam
- Appropriate tooth exposure
- Controlled moisture
- Sufficient access and visibility
- Patient comfort
- Minimal interference with the planned procedure
The exact setup can vary depending on the tooth, procedure, anatomy, and clinical situation.
This is why rubber dam isolation should be approached as a clinical technique rather than a fixed sequence that works identically in every case.
Why Proper Isolation Matters During Clinical Procedures
Moisture and contamination can make some dental procedures more difficult to control.
When the treatment area is properly isolated, the dentist can work within a more predictable field instead of continuously managing saliva or soft-tissue interference.
Isolation can be particularly relevant when the procedure requires:
- A controlled working field
- Protection from moisture contamination
- Better visibility
- Protection of the treatment area
- More precise clinical handling
For a dentist learning the technique, the important point is to understand when isolation is needed, how much isolation is required, and how the setup should be adapted to the procedure.
Choosing the Right Rubber Dam Setup
The rubber dam setup should be planned according to the tooth and the procedure rather than using the same arrangement for every case.
Before placement, the dentist should consider which teeth need to be isolated, where access will be required, and whether the selected clamp can provide adequate retention without interfering with the working area.
Selecting the Appropriate Rubber Dam Sheet
Rubber dam sheets are available in different thicknesses and sizes. The choice should take into account the procedure, tooth position, and amount of tissue retraction required.
A suitable sheet should provide enough coverage for the planned isolation while allowing the dentist to maintain visibility and access.
The sheet should also be checked before use for defects or damage. A small tear can compromise the isolation once the dam is placed.
Clamp Selection Matters
The clamp is responsible for helping stabilize the rubber dam around the selected tooth.
Choosing a clamp simply because it fits the tooth approximately can create problems. The clamp should provide appropriate retention while remaining stable during the procedure.
Before placement, check:
- Whether the clamp is suitable for the tooth
- Stability on the tooth
- Contact with the surrounding tissues
- Whether it interferes with the planned access
- Whether the rubber dam can be positioned properly around it
The clinician should also inspect the clamp before use and ensure it is functioning properly.
Preparing the Tooth Before Isolation
Successful isolation begins before the rubber dam is placed.
The tooth should be examined for factors that may affect clamp stability or dam adaptation. Existing restorations, irregular contours, deep cervical areas, partially erupted teeth, and other anatomical considerations can make isolation more challenging.
If the tooth cannot provide adequate retention, simply applying more force to the clamp is not the solution.
The dentist should first understand why the isolation is difficult and determine whether an alternative approach is required.
Common Mistakes Before Rubber Dam Placement
Some isolation problems begin before the sheet even reaches the patient’s mouth.
Choosing the Clamp Without Evaluating the Tooth
A clamp should be selected after considering the tooth’s shape and retention areas, not only its general size.
Ignoring Patient Comfort
A technically stable clamp can still create unnecessary discomfort if it is positioned incorrectly or places excessive pressure on the surrounding tissues.
Patient comfort should be considered during the entire setup.
Failing to Plan Access
The rubber dam and clamp should provide isolation without unnecessarily obstructing the area where the dentist needs to work.
Poor planning can make a technically successful isolation difficult to use clinically.
Starting Without Checking the Setup
Before beginning the procedure, confirm that the dam, clamp, frame, punch, floss, and other required items are ready.
Having everything prepared beforehand reduces interruptions and makes the isolation process more organized.
Placing the Rubber Dam: Where Technique Makes the Difference
Once the tooth, clamp, and materials have been selected, the next challenge is achieving stable isolation without compromising access or patient comfort.
The rubber dam should be positioned carefully so that the selected tooth remains clearly accessible while the surrounding area is adequately separated from the working field.
Establishing a Stable Seal
The seal around the isolated tooth is one of the most important aspects of rubber dam isolation.
If the sheet does not adapt properly around the cervical area, saliva or moisture can pass underneath the dam. This can compromise the isolation and make the working field less predictable.
The clinician should therefore check the adaptation around the tooth after placement rather than assuming that the isolation is complete.
Managing Leakage Around the Tooth
Leakage can occur for several reasons, including:
- Inadequate adaptation of the sheet
- Incorrect clamp positioning
- Irregular tooth contours
- Insufficient tissue retraction
- A damaged or improperly positioned rubber dam
When leakage is noticed, the solution should not simply be to continue working.
First identify where the seal is failing and why.
Depending on the clinical situation, the dentist may need to adjust the dam, improve adaptation, reposition the clamp, or use an appropriate sealing method.
Avoiding Excessive Tension
The rubber dam needs sufficient tension for stability, but excessive stretching can make placement uncomfortable and may increase the likelihood of tearing.
The sheet should be positioned so that it remains stable while providing adequate access to the treatment area.
This balance between retention, adaptation, access, and patient comfort is an important practical aspect of isolation.
Checking the Isolation Before Starting Treatment
Once the rubber dam is positioned, take a moment to evaluate the complete setup.
Ask:
- Is the tooth clearly visible?
- Is the clamp stable?
- Is the cervical area adequately sealed?
- Is moisture controlled?
- Can the required instruments reach the treatment area?
- Is the patient comfortable?
- Is the dam interfering with the planned procedure?
This short check can identify problems before treatment begins.
A few seconds spent correcting an unstable setup can prevent repeated interruptions during the procedure.
Common Rubber Dam Placement Problems Dentists Should Recognize
Even when the basic steps are understood, rubber dam isolation can become difficult when the clinical situation does not provide ideal conditions.
Recognizing the source of the problem is more useful than repeatedly adjusting the dam without understanding why the isolation is failing.
The Clamp Keeps Moving
If the clamp is not stable, the first step is to reassess its fit and the tooth’s available retention areas.
A loose clamp can compromise the entire setup and may interfere with the procedure.
The solution may involve selecting a more appropriate clamp or modifying the isolation approach rather than simply increasing pressure.
The Rubber Dam Does Not Adapt Around the Tooth
Poor adaptation can create spaces between the rubber sheet and tooth surface.
This can allow saliva or moisture to enter the isolated field.
The dentist should check the cervical adaptation carefully and correct the area before starting treatment.
The Dam Tears During Placement
Tearing can occur when the material is stretched excessively, when the punched hole is inappropriate for the tooth, or when the sheet encounters a sharp area.
A damaged sheet should not be ignored if the tear compromises isolation.
Checking the dam before placement and handling it carefully during positioning can help reduce avoidable damage.
Managing Difficult Teeth and Clinical Situations
Not every tooth provides ideal conditions for rubber dam isolation.
Partially erupted teeth, irregular tooth shapes, limited crown structure, deep cervical areas, and challenging posterior access can make placement more difficult.
These situations require the dentist to think beyond the standard setup.
Instead of forcing the same technique into every case, consider:
What is preventing stable isolation?
Is the problem related to:
- Tooth anatomy?
- Clamp retention?
- Sheet adaptation?
- Access?
- Tissue interference?
- Patient positioning?
Identifying the actual problem makes it easier to select an appropriate solution.
Why Hands-On Practice Matters
Rubber dam isolation is a practical skill. Reading about clamp selection or watching a demonstration can explain the process, but it does not completely replace physical practice.
Hands-on learning allows dentists to become familiar with:
- Selecting and handling clamps
- Positioning the rubber dam
- Creating proper adaptation
- Managing difficult isolation
- Identifying leakage
- Maintaining access during treatment
This is particularly relevant for dentists who want to strengthen their clinical skill set through structured hands-on dental training rather than relying only on theoretical instruction.
What Should Dentists Look for in Rubber Dam Training?
A useful training program should not focus only on demonstrating how to place the rubber dam.
It should help the learner understand why the technique works, what can go wrong, and how the approach can be adapted to different clinical situations.
Practical training should ideally include demonstration, guided practice, feedback, and opportunities to repeat the technique.
For dental professionals in Andhra Pradesh looking to strengthen practical skills, a structured clinical learning environment can provide a focused way to develop these techniques.
How Dentists Can Build Better Rubber Dam Isolation Skills
Rubber dam isolation becomes easier when the dentist understands the reason behind each step rather than treating placement as a fixed routine.
With regular practice, dentists can become more familiar with clamp selection, sheet positioning, cervical adaptation, and maintaining access throughout the procedure.
The goal is not simply to place the rubber dam quickly. The goal is to create stable, effective isolation that supports the procedure from start to finish.
A Practical Approach to Improving Technique
Before each procedure, take a few moments to plan the isolation.
Consider:
- Which teeth need to be isolated?
- Which tooth will provide reliable clamp retention?
- Where will access be required?
- Could the tooth anatomy make sealing difficult?
- What materials and instruments should be prepared beforehand?
Frequently Asked Questions
Is rubber dam isolation difficult to learn?
The basic technique can be understood relatively quickly, but developing consistent clinical control requires practice. Different tooth shapes and clinical situations can require different approaches.
Why does my rubber dam keep leaking?
Leakage can result from poor adaptation, an unsuitable clamp, irregular tooth contours, inadequate tissue management, or damage to the rubber sheet. Identifying the exact source of the leak is the first step toward correcting it.
How do I choose the right rubber dam clamp?
Clamp selection should be based on the tooth’s shape, available retention, and the requirements of the procedure. The clamp should remain stable without unnecessarily interfering with access or causing excessive tissue pressure.
Can rubber dam isolation be used for different dental procedures?
Yes. Rubber dam isolation can be useful in procedures where controlling moisture and maintaining a separated working field are important. The appropriate setup depends on the specific procedure and clinical circumstances.
Why should dentists learn rubber dam isolation through hands-on practice?
The technique involves physical handling, positioning, adaptation, and troubleshooting. Hands-on practice allows dentists to develop familiarity with these steps and receive feedback on technique-related problems.
Rubber dam isolation is more than placing a sheet around a tooth. Good isolation requires planning, appropriate equipment selection, stable positioning, effective sealing, and the ability to troubleshoot problems during the procedure.
For dentists developing their clinical skills, consistent practice can make the technique more predictable and comfortable to perform.
For dental professionals seeking structured practical learning, hands-on clinical training can provide an opportunity to practise isolation techniques, understand common errors, and develop greater confidence in applying them clinically.
At Kaamat Dental Academy, this practical approach aligns with the broader goal of developing clinically relevant dental skills through structured learning and hands-on exposure.
